How to Fix Paint Chips and Scratches on Your Car
Tools You’ll Need
- Factory matched car paint
- Squeegees
- Pipettes or paint brushes
- Nitrile gloves
- Wiping/blending cloth
- Mircofiber towel
- Blending solution and sealant
Step 1: Clean and prep the chipped areas.

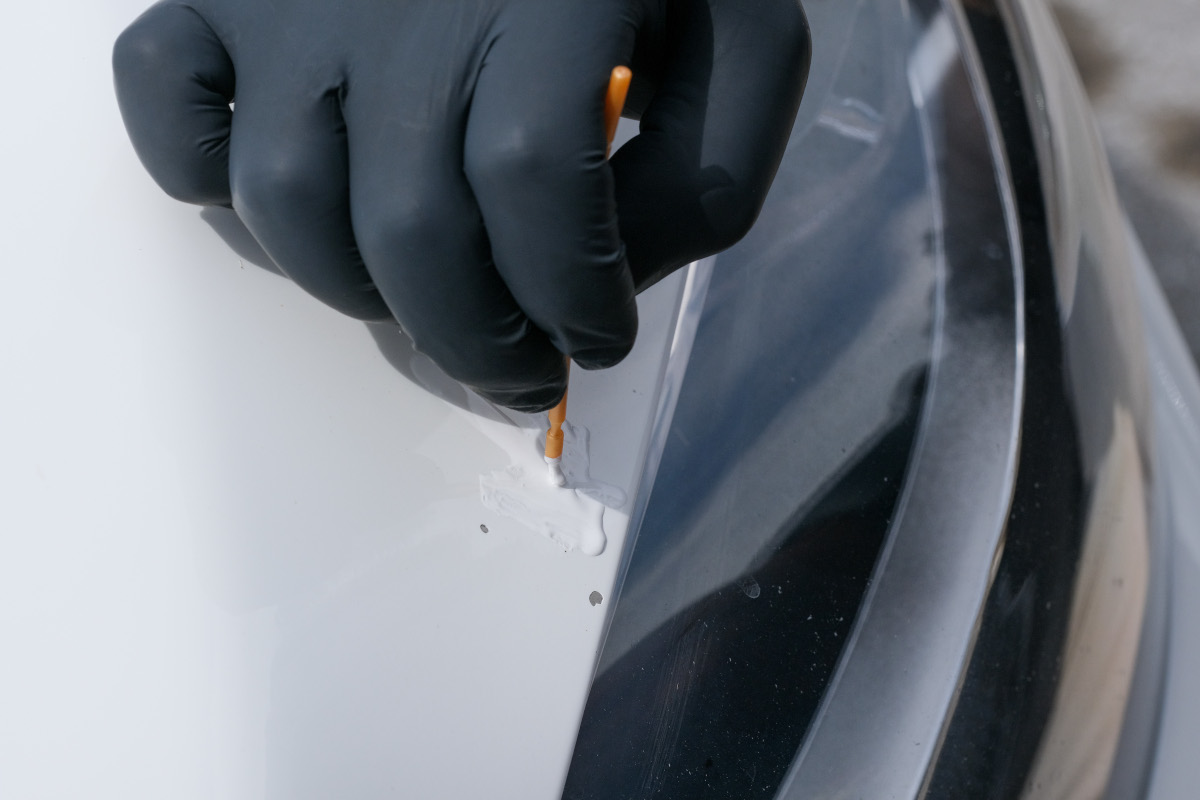
Step 2: Apply the touch up paint.
Next, apply your factory matched automotive paint beside the chip with a brush or pipette, or by squeezing droplets from the touch up paint bottle. It is important not to directly apply the paint on the chip or scratch, so that when you level the paint across the chip it will naturally fall into the damaged area and be smooth and flush.
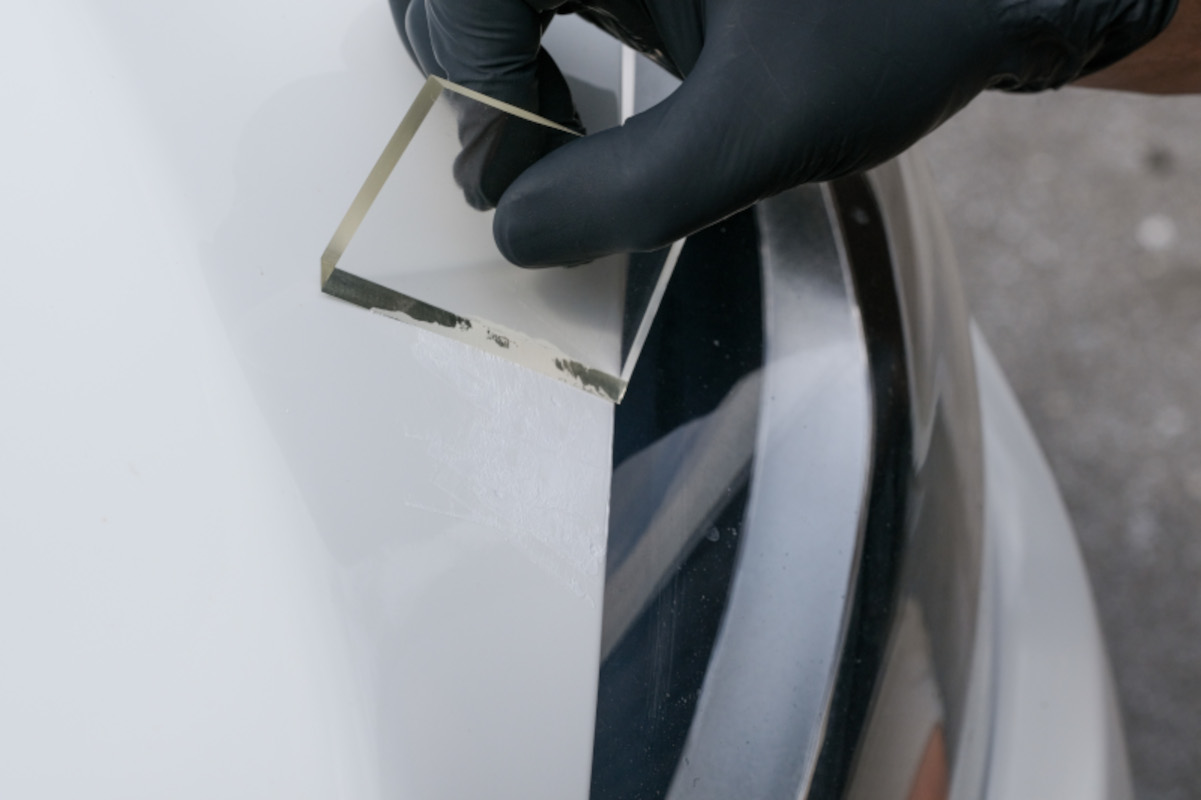
Step 3: Level the paint into the chip or scratch.
Level the car paint using either a squeegee or Ultrabrush, or by lightly swiping the paint across the chip using the flat side of your gloved thumb or finger.
Don’t press down when swiping the paint over the chip as this could cause the paint to be forced out of the chip. Very light pressure works best to create a level fill.
Once the paint is leveled flat across the chip, allow a couple minutes for it to dry to the touch before attempting to blend away the excess paint. If you touch the paint and it sticks to your glove or is still tacky or wet, let it dry for another minute or two.
Do not try to fill the chip above the surface level of the car’s original paint. With our process, the paint needs to be leveled flat to prevent pulling the paint from the chip when performing the final blending step of the process.
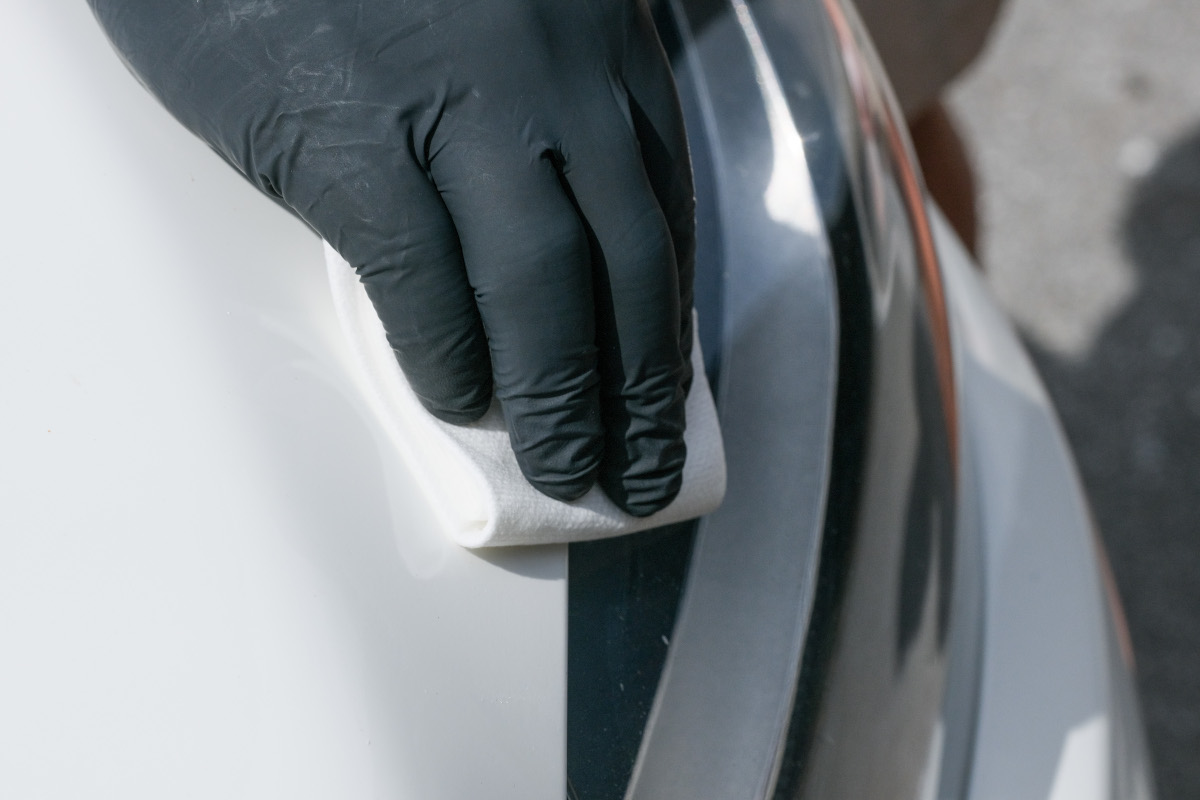
Step 4: Blend away excess paint and seal the chip repair.
Finally, you will need to blend away the dried excess paint on the clearcoat surrounding the repaired area using a lint-free wiping cloth and blending solution.
Our Sealact™ blending solution also acts as a sealant for the paint chip repair, making it a great all-in-one solution that eliminates the need for a separate clearcoat. Vigorously shake the Sealact™ bottle for 10 seconds to evenly mix the solution. The components in the Sealact™ separate quickly and must be consistently mixed for the process to work properly. Flip open the cap and squeeze enough Sealact™ to moisten about a one inch square section of the wiping cloth. With a rapid back and forth motion and very light pressure, wipe over the dried paint on the car.
Within about 30-45 seconds you will slowly begin to see the excess paint soften, dissolve, and pull away from the car’s panel. If you apply too much pressure, you can pull paint from the chip. If this happens, repeat the process using less pressure. If the paint grabs to the wiping cloth, add extra Sealact™ to keep the cloth lightly lubricated.
Once the excess paint is visually removed from around the chip, stop blending and immediately buff the area clean with a microfiber towel or soft cloth. This will remove any surface haze from the leftover Sealact™ or paint residue on the car.
Build chip fill with additional paint layers.
If repairing a deep paint chip, you may find that the level of fill after one application remains slightly below the surface of your vehicle’s original paint. However, you can apply additional layers of our factory-matched car paint to build up the chip fill. Simply repeat the steps above until desired fill is achieved. Allow two hours between paint applications to give each layer time to harden and cure.
How long should car paint dry before driving?
Once the blending step is completed, it is safe to drive the car. Rain and even a quick hand wipe of the panel with a quick detail product will not impact the Dr. ColorChip repairs.
Paint manufacturers will typically tell you that automotive paint needs 30 days to fully cure. We do recommend allowing the paint this 30-day cure time before doing any aggressive compounding with a rotary buffer or application of a ceramic coating.
More about Dr. ColorChip
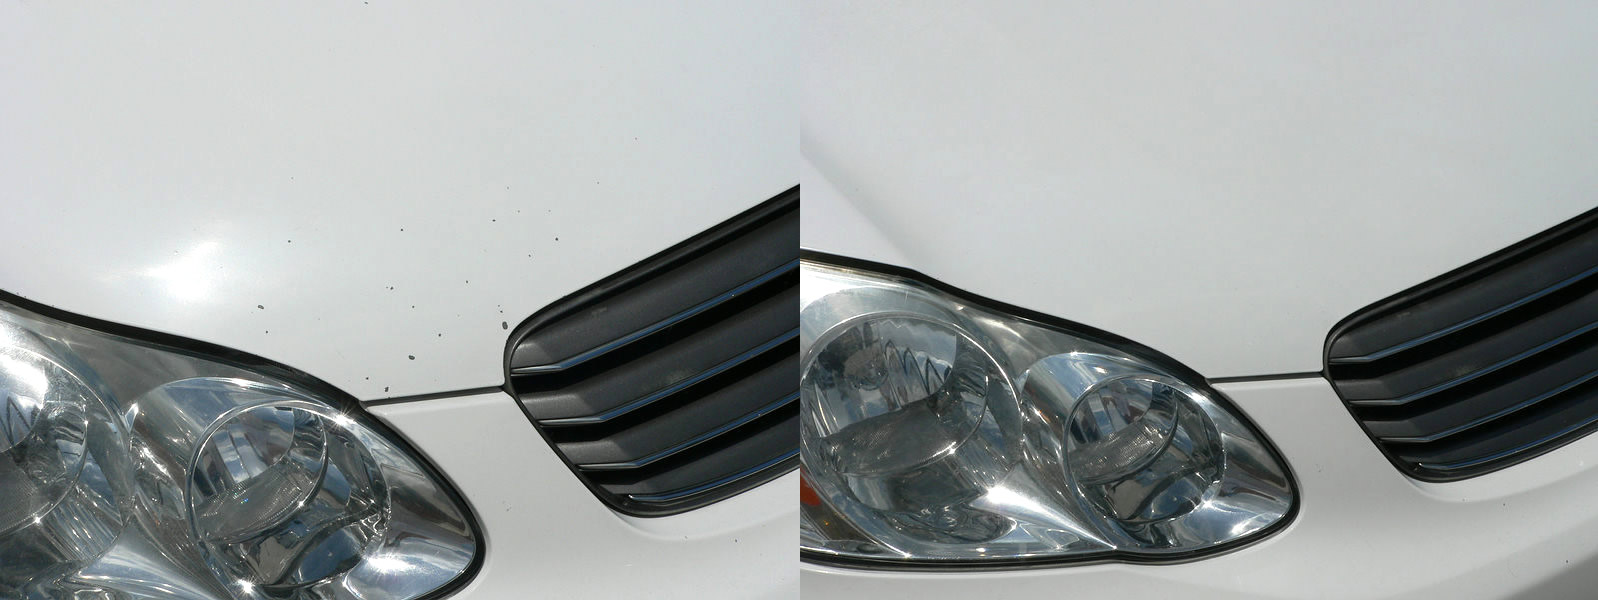
Since 2003, the Dr. ColorChip™ system has been used on millions of vehicles with proven consistent results! Our proprietary 3-Step process, APPLY-LEVEL-BLEND, is a simple and extremely effective system used extensively by professionals in the commercial touch-up industry to repair minor paint chips and scratch damage on used cars. The Dr. ColorChip™ process offers far superior results than what can be achieved using traditional touch up paint pens or brush cap bottles of auto paint typically offered at retail stores and car dealerships.
Our automotive paint is designed to dry within minutes yet remain pliable so it can be manipulated and flattened over chips and deep scratches. The excess paint can then be quickly blended away using our proprietary Sealact™ blending solution, leaving paint only in the chipped areas. The end result is a professional permanent repair.
Backed by a long history of customer satisfaction and excellent customer service and support, the Dr. ColorChip™ team will deliver results for you.